
FOOD · RECIPES
I Tried the Viral Mama Llama Cinnamon Rolls. This Copycat Gets You 98% There.
A giant, gooey cinnamon roll with layers of cinnamon-brown sugar filling, a caramel-maple bottom, and just enough coffee in the frosting to make everything taste deeper—not like coffee.
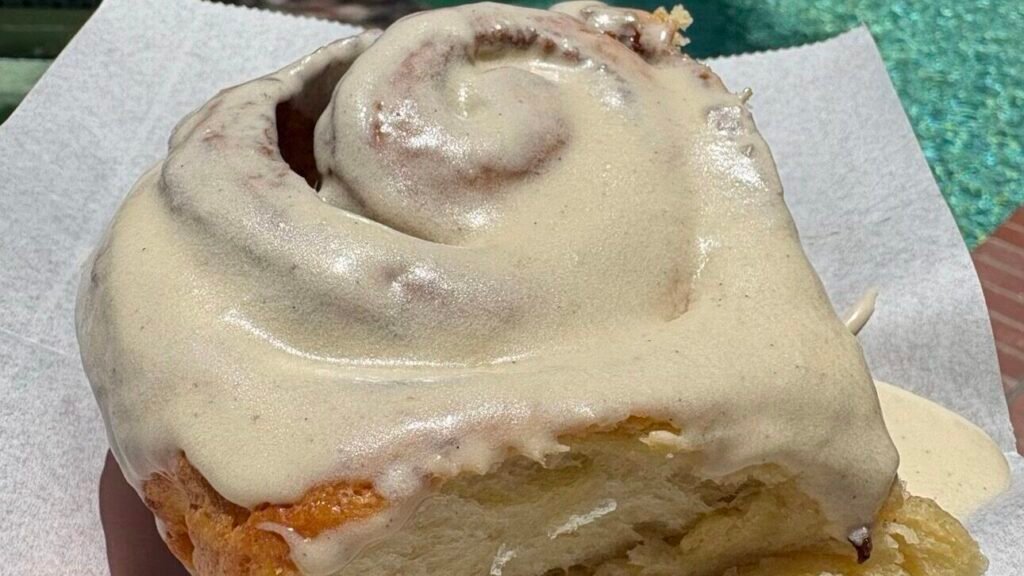
I kept seeing local influencers post about Mama Llama’s cinnamon rolls until eventually, they were all I could think about. I signed up for a drop, joined what felt like half the city trying to get them, failed, tried again, and eventually got my hands on two.
Unfortunately, they were worth the trouble. Better than I expected and somehow even bigger in person. The videos do not adequately prepare you for the size of these buns.
Then I had another problem: I wanted more.
I tried Kiley’s Perfect Classic Cinnamon Rolls from Well Made by Kiley, which are delicious and absolutely worth making, but they weren’t quite the Mama Llama roll I remembered. So I started experimenting, pulled techniques from several recipes I’d tried, changed a few things, and Frankenstein-ed my way here.
This is not Mama Llama’s recipe. If you want the original, you can purchase her official recipe directly from Mama Llama Bakery. This is my independently tested copycat, and I’d say it gets you about 98% there.
Because sometimes you don’t want two cinnamon rolls.
You want fifteen.
The 98% There Cinnamon Rolls
MAKES: Approximately 15 very large cinnamon rolls
Ingredients
For the Dough
- 1½ cups warm milk
- ½ cup sugar, for the yeast
- ½ cup sugar, for the dough
- 1 packet active dry yeast
- 1 cup Greek yogurt (I used fat-free Fage) or sour cream
- 3 eggs
- 1 teaspoon vanilla
- ½ cup oil (I used avocado oil; vegetable oil works too)
- 8½–9 cups bread flour
- 1 teaspoon salt
- 2 teaspoons baking powder
- 1 teaspoon baking soda
- ½ cup (1 stick) butter, room temperature
For the Cinnamon Filling
- 1 cup (2 sticks) butter, softened but not melted
- 2 cups brown sugar
- 4 tablespoons cinnamon
- 2 teaspoons vanilla extract or vanilla bean paste—paste is better
For the Caramel-Maple Bottom
- 6 tablespoons butter, very soft and almost melted
- ¾ cup brown sugar
- 2 tablespoons real maple syrup
- ⅜ teaspoon fine salt
- ¼ teaspoon vanilla bean paste
For the Frosting
- ½ cup butter, room temperature
- 2 tablespoons plain cream cheese, softened
- 2–2½ cups powdered sugar
- 1–2 tablespoons milk or heavy cream
- ¾ teaspoon vanilla bean paste
- 1 tablespoon maple syrup
- 1 tablespoon cooled coffee
- Pinch of fine sea salt
Make the Rolls
1.Wake Up the Yeast
Warm the milk until it feels comfortably warm but not hot. For the Type As, aim for about 105°F. Stir in ½ cup sugar and the yeast. Let it sit until you see bubbles and get that unmistakable fermented, yeasty smell. For the Type As again, this should take about 10–12 minutes.
2. Make the Dough
Add the remaining ½ cup sugar, Greek yogurt or sour cream, eggs, vanilla, and oil. Gradually add the bread flour along with the salt, baking powder, and baking soda until everything comes together into a shaggy dough.
3. Knead in the Butter
Gradually work the softened butter into the dough as you knead. Keep going until the butter is fully incorporated and the dough becomes smooth, soft, and glossy.
I don’t own a stand mixer, so I kneaded mine vigorously by hand for 32 minutes. If you have a mixer with a dough hook, about 10 minutes is a good guideline. Either way, pay more attention to the dough than the clock. You’re looking for that smooth, glossy finish.
4. Let It Rise
Lightly grease a large bowl, place the dough inside, and cover it with a clean kitchen towel.
Put it somewhere warm and draft-free. I use the microwave or oven—both turned OFF.
Let the dough rise until it doubles in size, about 45–60 minutes. Mine took 45 minutes in a warm kitchen.
5. Roll It Out
Generously flour your work surface and turn out the dough.
Use a rolling pin, or any clean cylindrical object you can recruit for the job, and roll the dough into a rectangle approximately 30 × 16 inches and no more than ¼ inch thick.
It should feel big. That’s the point. You want all those layers.
6. Add the Filling
Mix the softened butter, brown sugar, cinnamon, and vanilla together into a thick paste.
Spread it evenly over the dough, getting reasonably close to the edges.
7. Commit to the Roll
Starting along one of the 30-inch sides, begin rolling the dough into a long log, tightening it as you go.
The beginning will feel awkward.
Commit to the roll.
Once you get past that first turn, it comes together into a nice long log.
8. Cut the Rolls
Cut the log into approximately 15 rolls, about 2 inches thick each.
Don’t overcomplicate this with floss or string. Use a sharp knife and slice through in one clean swoop. The dough cuts just fine and the rolls stay intact.
If you get 14 or 16 instead of exactly 15, don’t panic. These things are huge. You’ll be okay.
9. Give Them the Decadent Bottoms
Grease your baking pan with nonstick spray or butter. I used avocado oil spray.
Mix together the ingredients for the caramel-maple bottom. Place a portion of the mixture underneath each individual roll, then set the roll directly on top.
This is part of what makes these so indulgent. Every roll gets its own buttery, sticky caramel-maple bottom.
10. Proof Again
Cover the rolls and let them rise for another 45–60 minutes, until they’re noticeably puffy and expanded.
Mine took the full hour because my kitchen had cooled down later in the evening. Don’t obsess over the clock. Let the rolls tell you when they’re ready.
11. Brush and Bake
Before baking, lightly brush the tops with milk or heavy cream.
Heavy cream gives you a little more richness and caramelization, but if you don’t already have it, please don’t buy an entire carton for a few teaspoons. Milk works.
Bake uncovered at 375°F for 10–12 minutes.
Then reduce the oven to 350°F, cover the rolls, and bake for another 22 minutes.
Check them before pulling them out. Your eyes will tell you a lot here. If the centers still look too doughy or underdone, give them another 5 minutes and check again.
Make the Frosting
Add all the frosting ingredients to a bowl.
Using a hand mixer or whisk, start slowly until everything is incorporated. Once combined, increase the speed slightly to whip a little air into the frosting.
You’re looking for a thick, smooth glaze that’s still soft enough to spread.
And yes, there is a tablespoon of coffee in there.
The coffee trick was popularized by The Pioneer Woman, and it adds depth without making your frosting taste like coffee.
Frost Them Twice
As soon as the cinnamon rolls come out of the oven, spread about one-third of the frosting over the hot rolls.
Let it melt and seep into the warm swirls.
Wait 10 minutes, then add the remaining frosting over each roll. Use your judgment here. You can make them neat and pretty or absolutely bury them. I’m not here to police your frosting.
I personally think cinnamon rolls are meant to be eaten warm, so this is the point where I’m going in.
Storage
I left mine covered on the counter overnight and moved them to the refrigerator on the second day.
They stayed surprisingly soft and fluffy. When I wanted one, about 20 seconds in the microwave brought it right back to that warm, soft cinnamon-roll state.